From Script to Container: A Gentle Introduction to Docker
A step-by-step walkthrough of how to containerize the Streamlit app using Docker — simple, minimal, and beginner-friendly.
11/6/20257 min read
What is Docker and why should you care?
If you’ve ever tried sharing a Python project with someone else, you’ve probably run into the “it works on my machine” problem. Different dependencies, library versions, or operating systems can quickly make your code behave differently — or not at all.
Docker solves this by packaging your application and everything it needs to run into a single, portable container. Think of it as a lightweight box that holds your code, dependencies, and environment, so it runs the same way everywhere — on your computer, a colleague’s laptop, or a cloud server.
In this post, we’ll take the Streamlit simulation app from the previous article (https://randomstate21.com/looks-off-maybe-its-just-randomness) and dockerize it, step by step. The goal isn’t to cover everything Docker can do, but to build a simple, practical understanding of how containers work — and why they make deploying and sharing projects so much easier.
Docker vs. Traditional Virtual Machines
Before Docker, the common way to isolate and share software was through virtual machines (VMs).
A VM runs a full operating system inside another operating system, which means each one needs its own copy of the OS — making it heavy, slow to start, and resource-intensive.
Docker takes a lighter approach. Instead of virtualizing entire operating systems, it shares the host machine’s operating system kernel and isolates applications in containers. Because containers run directly on the host system’s kernel, they start almost instantly and use far less memory than traditional VMs.
Each container still includes everything your app needs — its code, dependencies, and environment — but without the overhead of a full operating system.
In simple terms:
Virtual machines simulate entire computers.
Docker containers isolate applications.
Both approaches have their place: VMs offer stronger isolation and are ideal for running different operating systems on the same hardware, while containers shine when you need lightweight, fast-deploying environments for consistent application delivery.
That’s what makes Docker so efficient for modern data science and web apps — like the Streamlit simulation we’ll containerize in this tutorial.
(For a more detailed comparison, see Docker vs. Virtual Machines on AWS
Images, Containers, and the Dockerfile
Before we start creating the files and setting up our project structure, it’s useful to understand the three key concepts that Docker is built around: images, containers, and the Dockerfile.
Dockerfile — the recipe
A Dockerfile is simply a text file that describes how to build your environment from the ground up.
You can think of it as a recipe:
Which base image to start from
Which Python packages to install
Which files to copy
Which command to run when the container starts
Docker reads this file and uses it to create an image.
Image — the packaged environment
A Docker image is the result of building your Dockerfile.
It’s a frozen, self-contained snapshot of everything your app needs:
The operating system layer
Installed libraries
Your application code
Environment configuration
Once an image is built, it never changes — it’s like a read-only template. You can share it, push it to the cloud, or run it on any machine that supports Docker.
Container — a running instance of an image
A container is what you get when you run an image. If an image is a recipe → a container is the meal prepared from that recipe.
A container is:
Isolated from the rest of your system
Lightweight (because it uses your host’s OS kernel)
Reproducible (runs the same everywhere)
You can start, stop, restart, or delete containers without affecting the underlying image. And you can run multiple containers from the same image at the same time — each is its own isolated instance.
A Quick Note on Docker Desktop
To follow along with this tutorial, you’ll need Docker Desktop, a user-friendly application that bundles everything required to run Docker on your machine.
Docker Desktop includes:
The Docker Engine, which builds images and runs containers
A graphical dashboard, where you can see your images, containers, logs, and resource usage
Command-line tools, so you can build and run containers from the terminal
Automatic updates and integrated support for Windows, macOS, and Linux
In simple terms, Docker Desktop is the “control center” that makes working with Docker easy, even if you’re new to it. Once installed, you can build images, start containers, and follow this tutorial without any extra setup.
(You can download it here: https://www.docker.com/products/docker-desktop/
What We’ll Build: Project Structure
To dockerize our Streamlit simulation app, we’ll use a simple project layout.
Inside a folder called convergence_app, we’ll place everything the container needs:
This minimal structure is all we need to build a fully portable, reproducible container for our Streamlit app.
Next, we’ll walk through how to create each of these files and build the Docker image.
Creating our files
Requirements.txt
The requirements.txt file is simply a plain text file that lists the Python libraries our app depends on. Docker will use this file to install the correct packages inside the container so that our Streamlit app runs reliably, no matter where it’s deployed.
For this project, the requirements are straightforward:
Dockerfile
The Dockerfile tells Docker how to build the image for our app — which Python version to use, which dependencies to install, which files to include, and how to start the application.
Here’s a minimal Dockerfile for the convergence_app project, followed by a short explanation of each line:
FROM python:3.11-slim
This tells Docker which base image to start from.
Here we use a lightweight Python 3.11 image (-slim keeps it smaller than the full image).WORKDIR /app
Sets /app as the working directory inside the container.
All subsequent commands (like COPY, RUN, CMD) will be executed from here.COPY requirements.txt .
Copies requirements.txt from your local project folder into /app in the container.
We do this before copying the rest of the code so Docker can cache the dependency installation step.RUN pip install --no-cache-dir -r requirements.txt
Installs the Python dependencies listed in requirements.txt inside the image.
The --no-cache-dir flag keeps the image smaller by not storing pip’s download cache.COPY . .
Copies the rest of your project files (including app.py) into /app in the container.EXPOSE 8501
Documents that the container will listen on port 8501, which is Streamlit’s default.
(You’ll later map this to a port on your host when running the container.)CMD [...]
This is the command that runs when the container starts.
Here we tell Docker to launch the Streamlit app:streamlit run app.py → runs your app
--server.port=8501 → runs on port 8501 inside the container
--server.address=0.0.0.0 → makes the app accessible from outside the container
With this Dockerfile in place, you now have everything you need to build a Docker image for your Streamlit app and run it as a container. But first, let's create the .dockerignore
.dockerignore
When Docker builds an image, it sends the entire contents of your project folder to the Docker engine as the build context. This often includes files that you don’t want inside your image:
Temporary files
Caches
.git history
Large logs
Virtual environments
OS-specific clutter
To keep the image small and the build process fast, we create a .dockerignore file.
It works just like a .gitignore: any paths listed here will be excluded from the build context.
A simple .dockerignore for this project might look like this:
Building the Docker Image
With the Dockerfile, .dockerignore, requirements.txt, and app.py in place inside convergence_app, we’re ready to build our first Docker image.
Open a terminal, navigate to the convergence_app folder, and run:
A quick breakdown:
docker build – tells Docker to build an image
-t convergence-app – gives the image a name (a tag); you can choose another name if you like
. – means “use the current folder as the build context” (where the Dockerfile and other files live)
On the first build, Docker will:
Download the base Python image
Install the dependencies from requirements.txt
Copy your app into the image
Subsequent builds will be faster as long as requirements.txt hasn’t changed, because Docker can reuse cached layers.
You can verify that the image was created by running:
Running the Container
Once the image is built, we can create and run a container from it.
In the same folder, run:
Let’s break down what this command is doing:
docker run – starts a new container from an image
-p 8501:8501 – maps port 8501 on your machine to port 8501 inside the container
convergence-app – the name of the image we built in the previous step
Because the Streamlit app inside the container is configured to run on port 8501 and listen on 0.0.0.0, this port mapping makes it reachable from your host machine.
Now you can open your browser and go to:
You should see the same Streamlit app as before — but this time, it’s running inside a Docker container.
If you want the container to stop when you close it in the terminal, just press Ctrl + C.
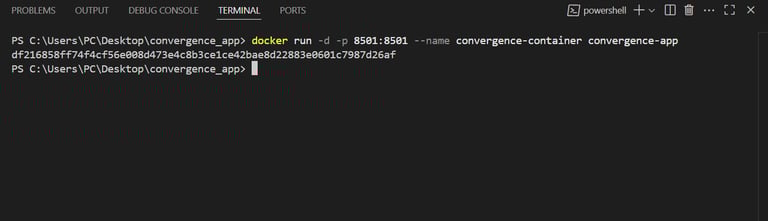
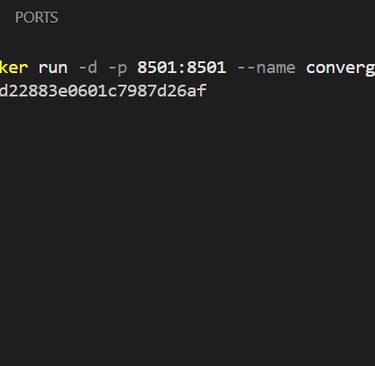
Optionally, you can run it in the background with:
-d runs the container in “detached” mode (in the background)
--name convergence-container gives the container a human-friendly name
You can then stop it with:
A last example
While running containers from the terminal is the most direct approach, Docker Desktop gives you a convenient graphical interface for managing everything without typing a single command.
First, here’s what it looks like when the container starts successfully in the terminal:
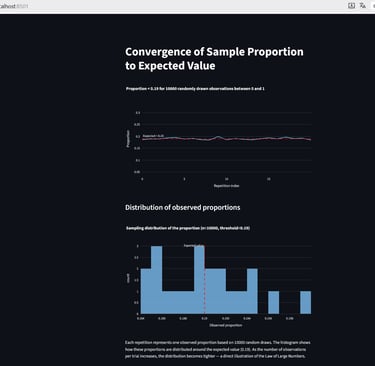
When the container is running, the Streamlit app becomes available at http://localhost:8501, as shown below:
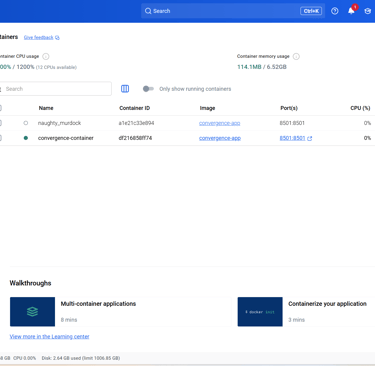
Once the container is running, Docker Desktop allows you to manage it visually.
From the dashboard, you can:
Start or stop containers with a click,
Restart them,
View logs,
Inspect resource usage (CPU, RAM, network, etc.), and
Delete containers or images when you’re done.
This makes it easy to experiment, especially as you learn Docker, without memorizing every command.
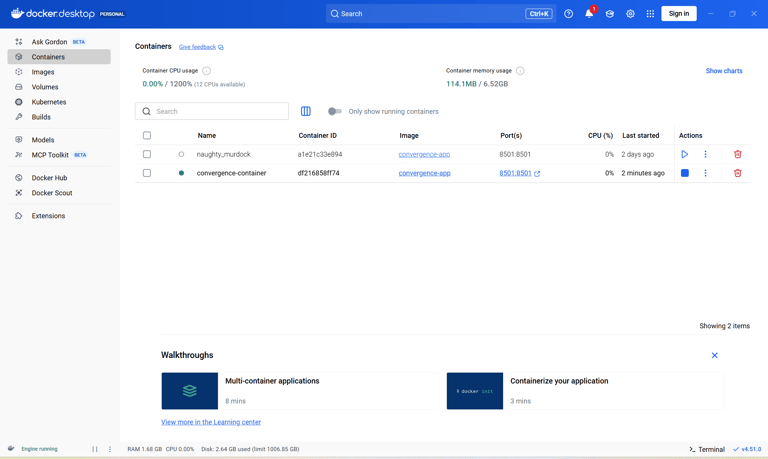
Below you can see our convergence-app container running in Docker Desktop:
The GUI confirms the same thing the terminal shows — the container is up, healthy, and serving your Streamlit app.
Wrapping Up
In this tutorial, we took a simple Streamlit app and packaged it into a fully portable Docker container.
Along the way, we:
Learned what images, containers, and Dockerfiles are,
Created the files needed to define our environment (requirements.txt, .dockerignore, Dockerfile),
Built a Docker image,
Ran the app inside a container, and
Verified that everything works using both the terminal and Docker Desktop.
With this foundation, you now have everything you need to containerize small applications and share them reliably.
Where to Go Next
This was intentionally a gentle introduction. Docker can do much more, such as:
Running multiple services together with docker-compose,
Building smaller and more efficient images,
Mounting volumes to persist data,
Passing environment variables for configuration,
Deploying containers in production environments.
We’ll explore some of these in future posts.